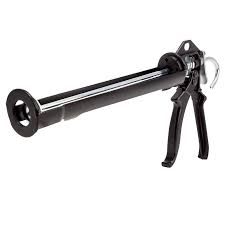
Using a caulking gun is a straightforward process. Here’s a step-by-step guide on how to use a caulking gun effectively:
Prepare the Surface:
Ensure that the surface you will be caulking is clean, dry, and free from dust, debris, or old caulk. Use a scraper or putty knife to remove any loose or peeling caulk.
Select the Caulk:
Choose the appropriate type of caulk for your project. Consider factors such as the material you are caulking, the location (indoor or outdoor), and the specific caulk properties required (e.g., waterproof, paintable, etc.).
Load the Caulk Tube:
Insert the caulk tube or cartridge into the caulking gun. Most caulking guns have a release lever or clamp mechanism that holds the tube securely. Ensure the tube is seated properly and ready for dispensing.
Prepare the Nozzle:
Use a utility knife or the built-in cutter on the caulking gun to cut the tip of the caulk tube at a 45-degree angle. The size of the cut will determine the size of the caulk bead. For most applications, start with a small cut and increase the size if needed.
Prime the Caulking Gun:
Pull back the rod or handle of the caulking gun to retract the plunger fully. This step removes any air trapped in the tube and prepares the gun for dispensing.
Apply the Caulk:
Hold the caulking gun at a 45-degree angle to the surface, with the nozzle touching the joint or gap being sealed. Squeeze the trigger gently and steadily to start the flow of caulk. Apply an even and continuous bead of caulk along the entire length of the joint. Maintain consistent pressure on the trigger to control the flow rate.
Smooth and Shape:
After applying the caulk, use a caulk smoothing tool or a wet finger to smooth and shape the caulk bead. This step ensures proper adhesion and creates a neat finish. Wipe off any excess caulk with a damp cloth or sponge.
Clean the Nozzle:
Before the caulk dries, use a damp cloth or paper towel to wipe off any excess caulk from the nozzle. This prevents dried caulk from clogging the nozzle and facilitates easier use in future applications.
Allow the Caulk to Dry:
Follow the caulk manufacturer’s instructions regarding the drying and curing time. Avoid disturbing or touching the caulk until it has fully cured to ensure proper adhesion and longevity.
Store the Caulking Gun and Dispose of the Tube:
After completing the caulking job, remove the caulk tube from the gun if it’s empty or needs to be replaced. Clean the gun and store it in a dry and secure location. Properly dispose of used caulk tubes according to local waste disposal guidelines.
By following these steps and practicing proper technique, you can effectively use a caulking gun to seal joints, gaps, and cracks in various surfaces.