While restoring a motorcycle, one of the parts that is often replaced without a DIY touch is the rear suspension.
The rear suspension of the CBR1000F (SC21) I am restoring had rust on the exterior of the damper inside the spring, which was quite noticeable.
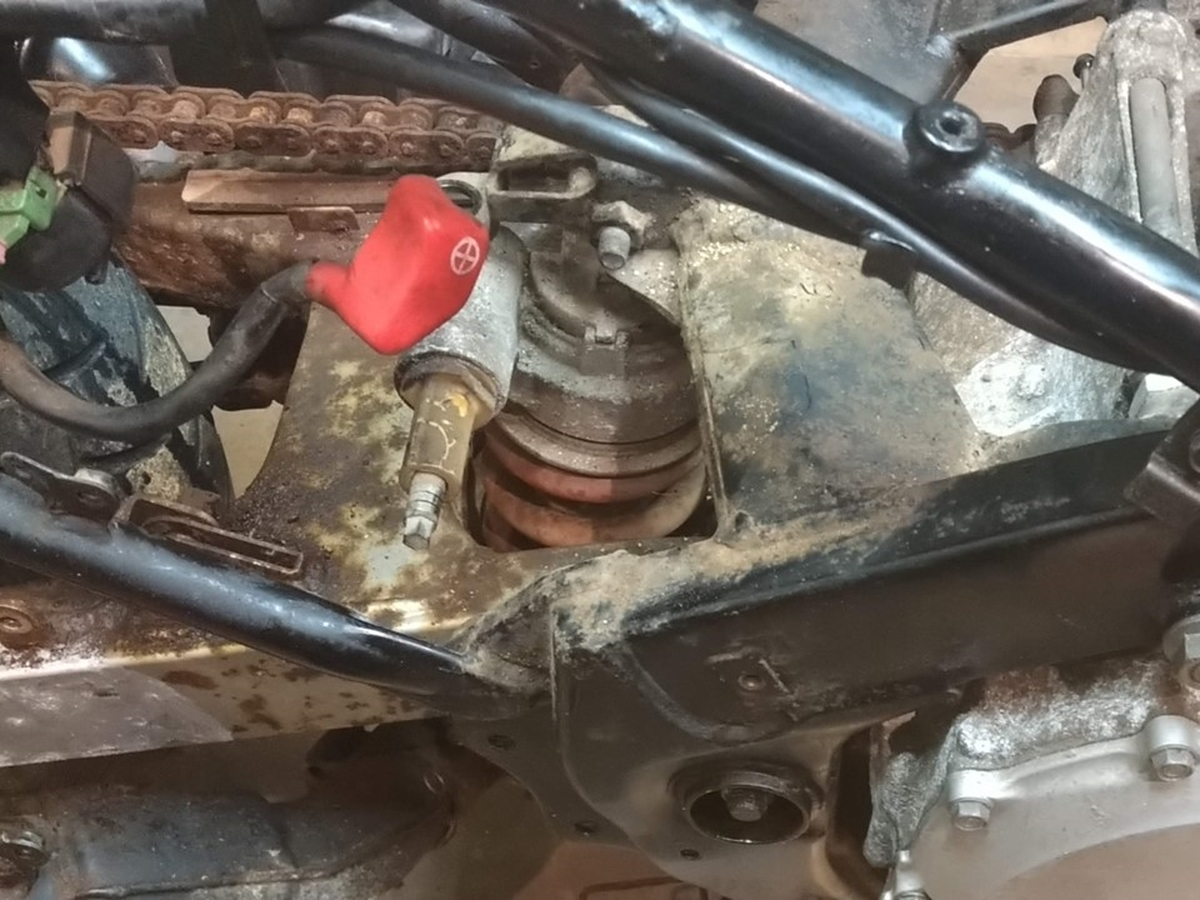
Condition before work started
We wanted to do something to clean it up, so we considered replacing it, but as a matter of course, it was discontinued and aftermarket parts are currently hard to find.
Fortunately, it was in good functional condition, so was it just a matter of appearance? So, at first, we tried to refresh it without disassembling it but failed.
As a result, we disassembled, removed rust, and painted as much as we could while looking at the maintenance manual. In this issue, we report on the process of trial and error and what we learned. (This DIY restoration has been a long time in the making.
(Please understand that this DIY restoration is more experimental than ever before.)
- Before disassembly
- Struggled a lot with how to remove the spring.
- Remove rust and repaint.
- Completed!
-
Work Summary
- Tools and equipment used
Before disassembly
We sought to clean it without disassembling it first.
Since the rear suspension contains moving parts such as dampers and bearings, we decided that sandblasting was not feasible, so we first cleaned it with soda blast to remove as much rust as possible.
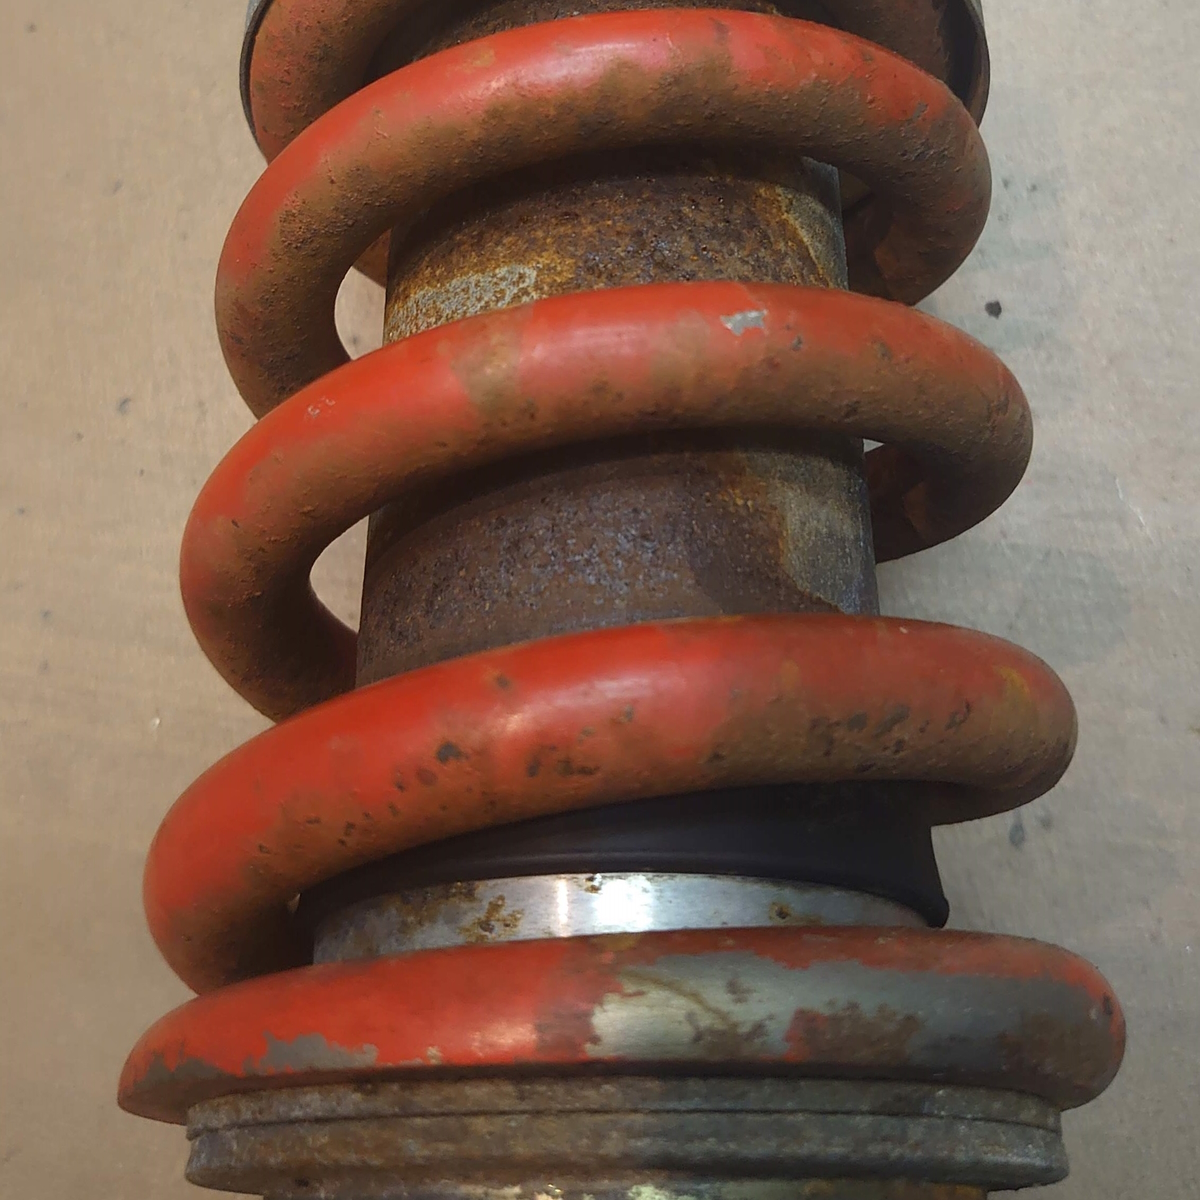
Unfortunately, however, soda blasting, which has a low grinding power, could not remove the rust from the pipes inside the springs, but only removed the paint from the outside of the springs, leaving the springs in a very incomplete state.
Rear suspension before disassembly
The rust on the outer tube of the damper was deeper than expected, so I tried applying a soft nylon disc grinder for rust removal, but the gap was too narrow to reach the area directly behind the spring, resulting in a striped pattern with a striking contrast.
I thought about giving up because it looked clean at a glance, but I saw some videos of people who had done it before me, compressing the springs and disassembling them.
I was going to regret doing it later, so I decided to remove the spring once and polish each part to understand the structure, and then try painting with the low-temperature gun coat.
Rear suspension after soda blasting
Struggled a lot with how to remove the spring.
According to the manual, a special tool is supposed to be used to compress and disassemble the spring, but since the factory tool was not available, we decided to try a familiar means.
The first thing I tried was a long bolt and a turnbuckle-type hook. (This is used as a restraint for steel bunk beds, etc.) Some people have been able to compress longer suspension springs with this, but the CBR1000F (SC21) had a shorter mono suspension with a higher spring coefficient, perhaps? The long steel bolts were easily defeated by the force of the springs and bent.
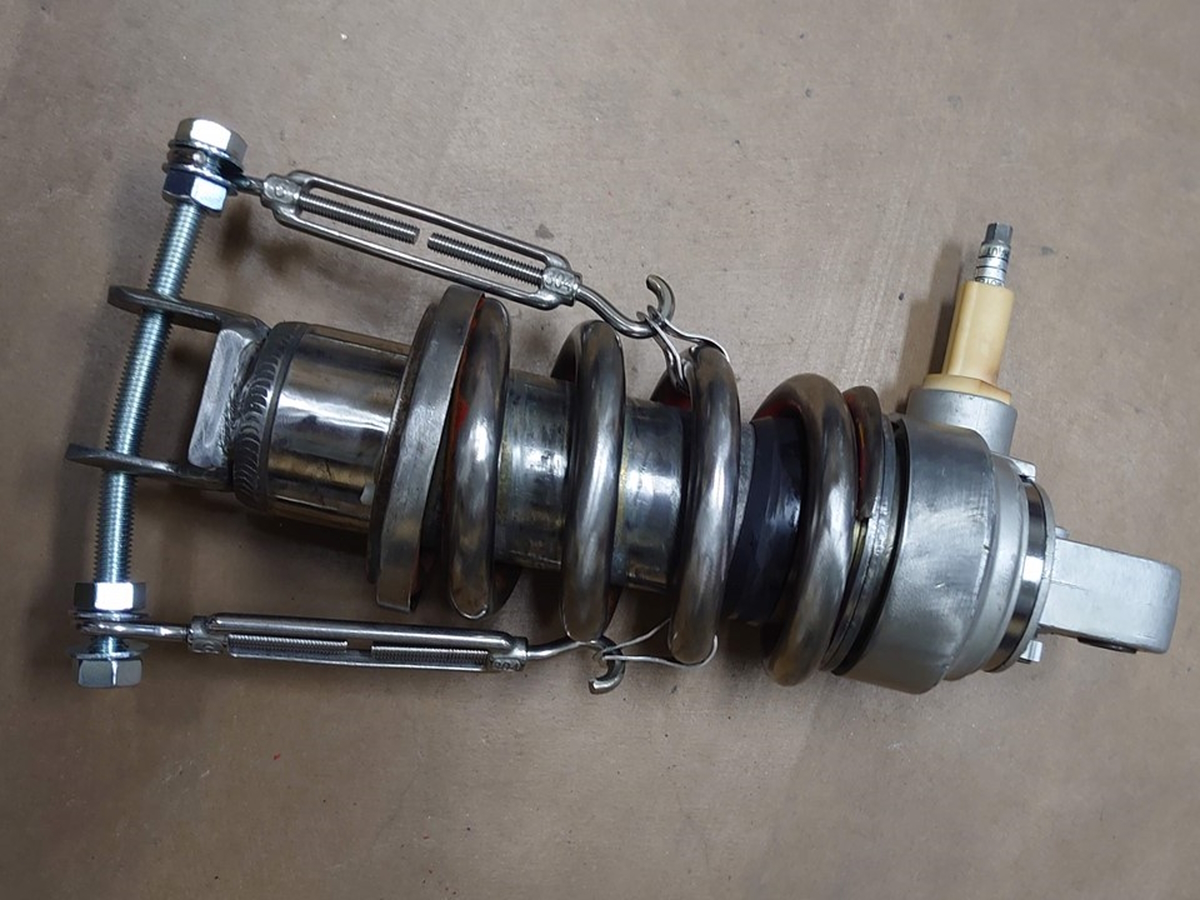
Trying to compress springs with long bolts
Next, I pulled out my car spring compressor tool and tried to apply it to the spring, but the claw to grip the spring was too large to use at all, and I immediately rejected it.
I noticed that there was not much clearance between the springs due to the springs being small and thick.

Spring compressor for cars with large claws
I had no choice but to buy a generic motorcycle spring compressor of the type without thicker claws. However, the compressor that arrived in the box said it was for twin shocks, which was not in the description of the product (I think).
After a little testing, I decided that it was still dangerous because of the force of the springs, and decided to use two sets of similar compressors to distribute the force (completely at my own risk).
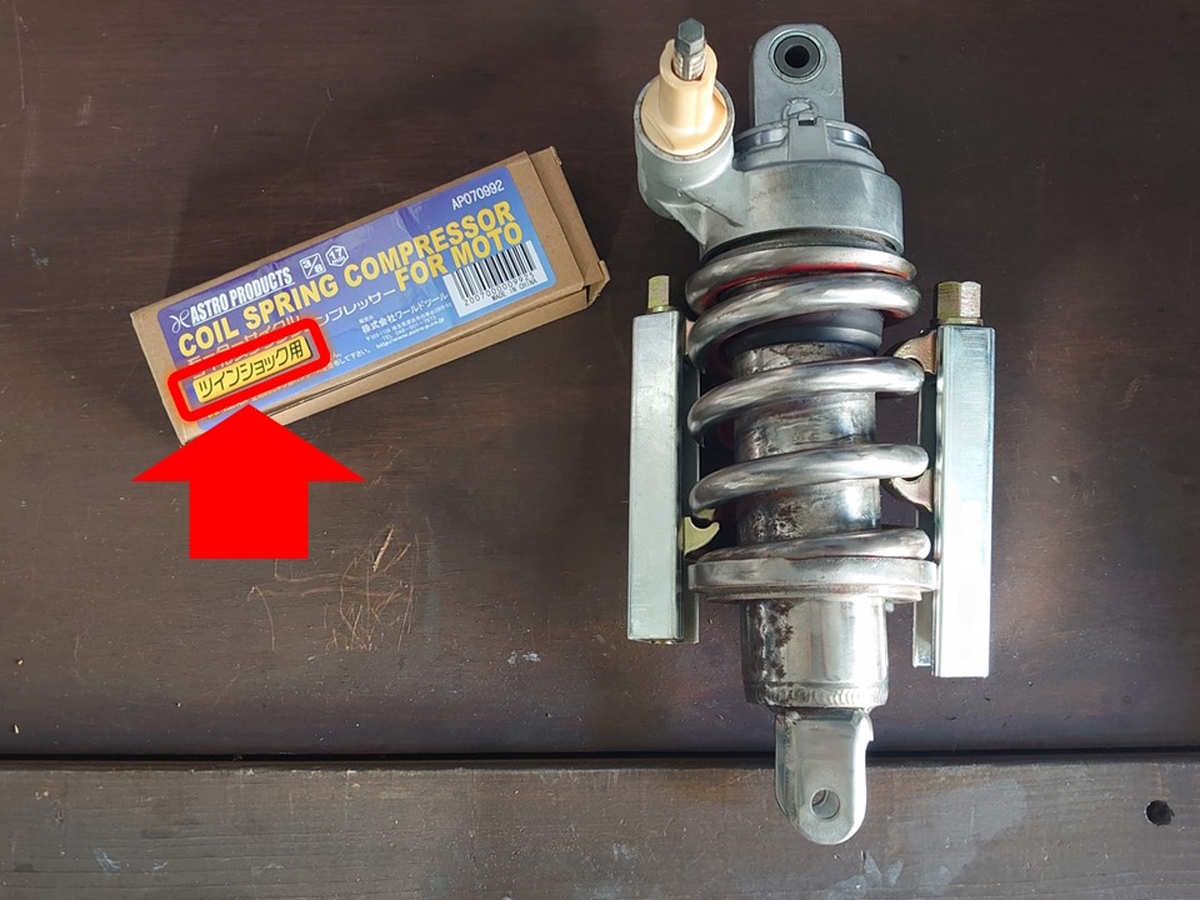
Claw-type spring compressor for motorcycles
We managed to compress the spring, but since we needed to tighten it up to compress it enough to disassemble it when we tried to tighten it up with a long wrench, we found that the exterior holding the shaft of the spring compressor opened up and the force escaped.
I was worried that it might not work again, but by clamping the exterior of the compressor in a vise and reinforcing it while tightening it a little at a time in sequence, I succeeded in compressing the spring as much as necessary without incident, although it took some time.
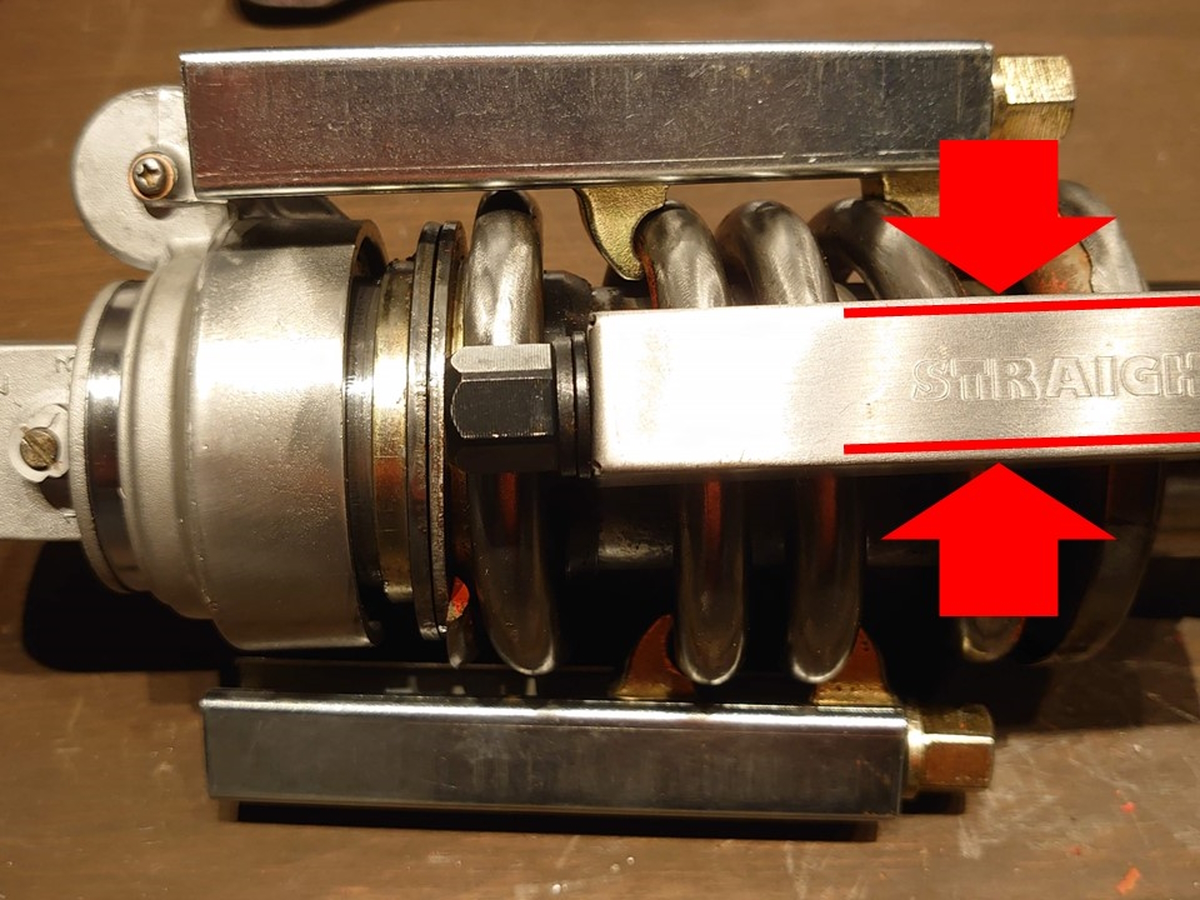
Pinch and compress to prevent spreading
Remove rust and repaint.
After that, we hit the sticking parts with a plastic hammer while spraying raspene, managed to move them, removed the stopper ring, and successfully separated the spring from the damper part. (I experienced firsthand that the springs used in the SC21 monoshock are thicker and shorter, making them more difficult to compress. I did the work at my own risk, but I recommend using the correct tools, even if they are a bit expensive, to ensure the safe and reliable disassembly of the mono suspension).
Once disassembled, the parts that were not working were sandblasted, and the deep rust on the outer tube of the damper was removed by grinding with a grinder.
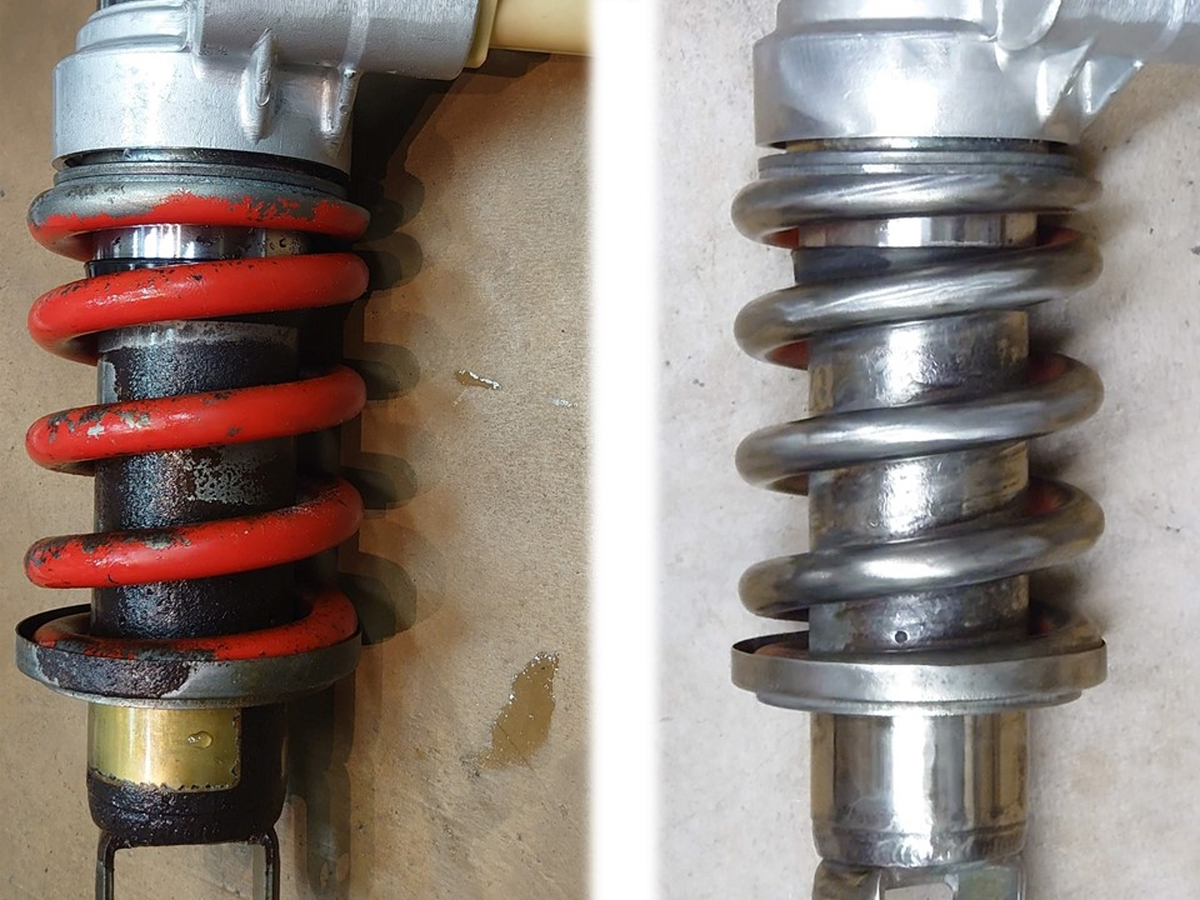
After that, we applied gun coat paint, which has excellent strength and oil resistance, but it is dangerous to put the oil-filled damper in the oven for baking, so we decided to try a special hardener for gun coat, which is explained to give 80% or more performance after baking at 80°C. The hardener is mixed with the oil-filled damper to make it elastic. We were told that mixing this hardener would prevent peeling even when applied to elastic parts, so we decided to use it on the springs as a test as well as for verification.
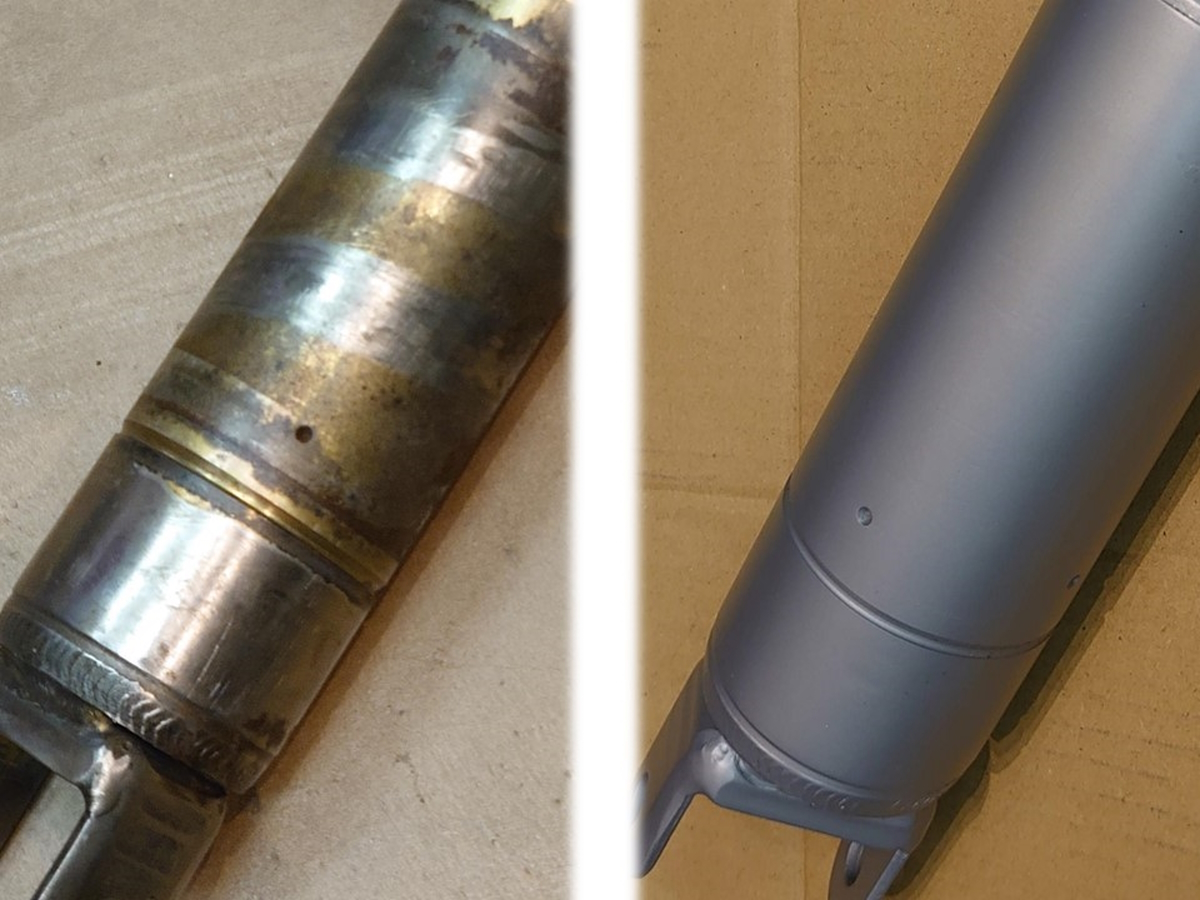
Damper before and after painting
After the painting was completed, the springs were compressed again for reassembly. Unfortunately, the spring compressor jaws scratched the paint on the springs, so they were repainted and baked at 80°C after the assembly was completed.
(This is what happens when things go wrong).

Rear suspension is being repainted
Completed!
It took a long time due to a lot of amateurish trial and error, but we managed to refresh and put it back together with only the additional expense of long bolts, a spring compressor x2, and a hardener for low-temperature baking.
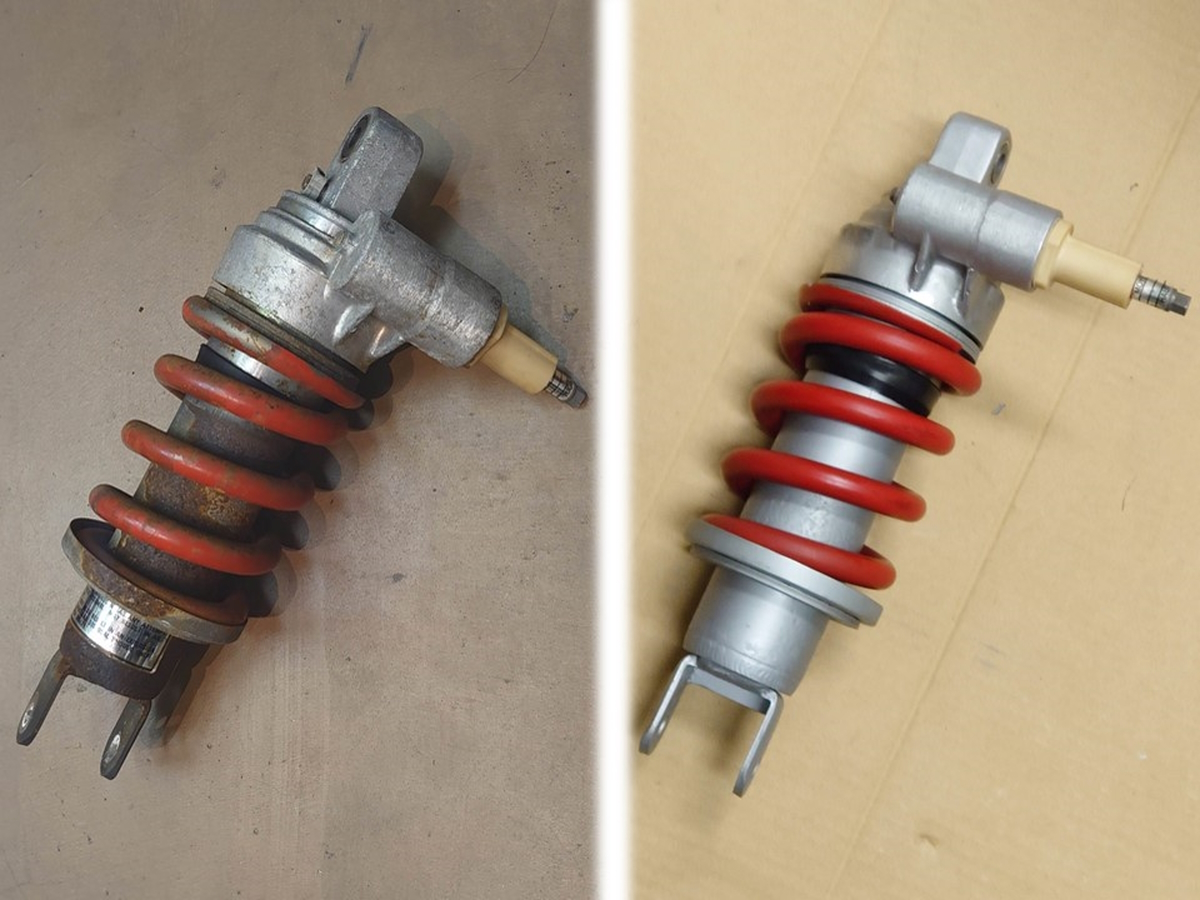
Rear suspension with refreshment completed
Work Summary
The rear suspension was disassembled, refreshed, painted, and reassembled.
Disassembly of the mono shock was tricky, but we managed to carry it out by using two sets of claw-type spring compressors. For painting after disassembly, we experimented with a gun coat with a low-temperature baking hardener. Durability will be checked in the future.
Although we learned quite a bit (and made some mistakes) in this work, we believe it was meaningful to be able to choose the method of disassembling and refreshing the rear suspension damper when there is no problem with it.
Next time, finally? We plan to show you how to polish and paint the coated and dirty engine.
Tools and equipment used
Long bolt, nut Not used as a result
Tension bolt Consequently not used
Spring compressor for car consequently not used
Claw-type spring compressor 2 sets
Vise
Raspene
Ratchet wrench
Plastic hammer
Soda blast set
Sandblasting set
Disk grinder
nylon polishing pads
Gun coat toolset
Special hardener for a gun coat for low-temperature baking